Here’s the original recipe.
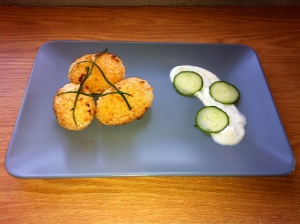
Harissa-spiced Marinated Potatoes with Cucumber-Dill Yogurt Sauce
I have one lovely recipe for marinated baked potatoes on here, which my sister gave me. I thought it time for another. This one’s a little different. For starters, it’s crusted in panko breadcrumbs. Also, it’s spiced with harissa. I bought my harissa, but you can make it if you like. I’ve seen recipes out there on the net. Warning! This recipe calls for 8-10 hours marination time. Also, harissa is super spicy. Taste it before you use it.
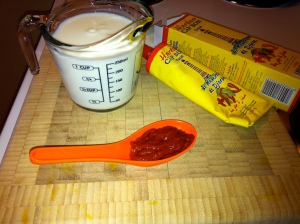
The low-fat buttermilk in this recipe is what you get in the US in cartons. If you’re in India, use 2 tbsp sour curds (yogurt) mixed with 2/3 cup warm water instead. The yogurt sauce is essentially a variation on cucumber raita.
You need:
- 4-5 small potatoes
- 1 tbsp harissa paste
- 1 cup low-fat buttermilk, room temperature
- 1 cup panko breadcrumbs
- salt to taste (I didn’t add any)
For the sauce:
- 1 cup thick yogurt (ideally Greek yogurt)
- 1 tbsp finely chopped dill
- 1/4 cup finely chopped English cucumber
- salt to taste
How to:
- First, mix all the ingredients for the yogurt sauce together, cover, and put it in the fridge.
- Parboil the potatoes. Don’t let them get mushy. Cool in cold water and ice.
- Peel the potatoes and if they are not small, cut them in half.
- Pierce with a fork.
- In a bowl big enough to hold the potatoes, mix the buttermilk and harissa paste. Whisk together.
- Place the peeled potatoes in this mixture.
- Cover and refrigerate for at least 8-10 hours. Overnight is good, 24 hours even better.

- Take the potatoes out of the fridge after 8-10 hours.
- Preheat the oven to 350 F.
- Place the panko breadcrumbs in a plate.
- Gently stir the buttermilk to make sure the potatoes are well coated with it, then lift out, shake gently, and roll in the panko.
- Cover well with the panko, then place the potatoes on a foil lined, oil sprayed baking dish.
- Cook uncovered in the oven for 20 minutes, or until the panko starts to brown.
- When it starts to brown, turn on the broiler and broil for a few minutes on each side for a nice browning. Be careful, as the panko can burn very fast. You have to watch it constantly.
- Remove from the oven and serve with chilled yogurt sauce.
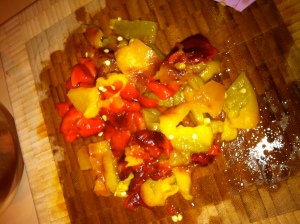
Roasted Peppers
Sometimes recipes call for roasted red peppers, and I rarely have a jar of those around. So I tried to roast them in the oven–broiled them, really–and it worked pretty well. I have not tried to broil eggplant (baingan) for bharta, but there’s no reason it shouldn’t work as well. Here’s how. All you need are peppers (bell peppers/capsicums, or other large peppers) and some oil spray.
- Preheat the broiler (if you don’t have a gas range). If you have a gas range, skip to step 2.
- Wash the peppers and pat dry.
- Coat with oil.
- Now, you have two options. One, roast over a gas burner, turning as the skin blackens. Two, place peppers on a foil-lined baking sheet and put under the broiler.
- When the skin starts to blacken, turn the pepper so another side can start charring/broiling. IMPORTANT: Use tongs!
- When the skin is fully blackened, put the peppers in a bowl and cover tightly with cling wrap. The steam loosens the skin.
- Move peppers to a colander. Place colander over a clean bowl.
- When the peppers are cool, cut gently with a sharp knife around the top stem and pull out gently. Discard the stem.
- Pull away the skin of the pepper and discard.
- Cut open the pepper lengthwise on one side and scoop out any remaining seeds–gently. Discard the seeds.
- Add the peppers to the juice in the clean bowl under the colander.
- Use the pepper as required or store in oil in the fridge for 2-3 days. The oil will acquire a pepper flavor, by the way, and can also be used in other recipes.
Yellow Squash and Pepper Pasta Sauce
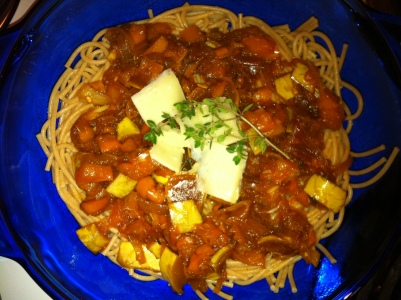
This sauce has a lovely aroma and a smooth texture and pairs well with a cheese that isn’t too bold. I used a BellaVitano (balsamic), which is one of my favorite cheeses. I ate it over spaghetti, but I imagine any other pasta would do just as well.
You need:
- 1 small yellow squash
- 1 medium red onion
- 1 orange bell pepper (capsicum)
- 1 cup vegetable stock (low-sodium or unsalted)
- 2-3 sprigs thyme
- salt and crushed red pepper to taste
- olive oil for cooking
How to:
- De-seed the yellow squash. The easiest way for me is to cut them in half and scoop the seeds out with a spoon. Discard the seeds and finely dice the squash.
- Remove the sides of the pepper. Cut away the white “ribs” and retain the rest of the sides. Discard the inside and top of the pepper. Dice finely (that means small :))
- Finely dice the onion.
- Heat the oil in a thick-bottomed pan. When the oil is hot, add the onion.
- Sweat the onions. This means you cook them slowly over low to medium heat. You can read about sweating vegetables here. Add the other vegetables and stir.
- After about 5-7 minutes, turn the heat up and cook over high heat, stirring constantly. Do this for about 3 minutes. Do not let the vegetables brown. If they start to brown, turn the heat down.
- Add the vegetable stock, thyme, crushed red pepper, and salt. Stir and cover, turning the heat down to medium.
- Let it cook, covered, for about 5-7 minutes, or until the vegetables start to soften.
- When the vegetables are soft, use a potato masher to gently mash some of the vegetables. Stir.
- Cook uncovered until the sauce has thickened, stirring occasionally.
- Serve over spaghetti. Grate cheese over the sauce and garnish with thyme before serving.
Pasta with Spinach and Red Onions
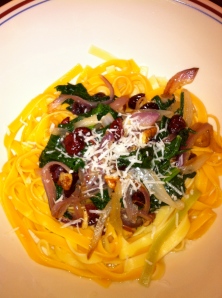
This pasta was beautiful. I know, I made it, and this is not very modest of me, but it really was beautiful. The spinach was a lovely green touch, the red onions were warm and rich, and I added a little dried cranberries and crushed pecans for extra flavor. When I made it, it was a little dry, but this is easily fixed by adding a little stock to the vegetables as you cook them, or a little of the water you cooked the pasta in.
I’ve been a little vague on the measurements for the pasta and spinach because this really depends on you, and how much you want to use. I usually use a handful of pasta for two people. In this case, I used two small fettuccine nests, which made a medium-sized portion for one person. I also used a small bunch of baby spinach. With spinach, remember it really cooks down to about a third (at least!) of its size, so make allowances for that.This recipe is for one serving of pasta — enough for one person.
You need:
- 1 small fettuccine nests, or enough pasta for one person
- 1 small bunch baby spinach, washed and drained
- 2 tbsp crushed pecans or walnuts
- 2 tbsp dried sweetened cranberries or raisins
- Salt and white pepper to taste (you can use black pepper)
- Olive oil for cooking
- Romano or parmesan cheese (or any other hard cheese you like to eat over pasta)
How to:
- Put six cups of water (or enough to cook the pasta) in a saucepan. Add 1 tsp oil and 1 tsp salt and bring to boil. When it boils, add the pasta. Cool until al dente–cooked through, but when you eat it, it should still be very, very slightly hard, not mushy.
- Cut the onions into very thin slices.
- Put 1 tbsp olive oil in a pan (more if your pan is not non-stick). When it is hot, add the onions, Stir and let it cook, stirring occasionally.
- Give the spinach a very rough chop (just once or twice).
- When the onions are cooked (but before the caramelize), add the spinach. The onions should still be a bit crunchy. Stir the spinach in. Add 1 tsp salt and stir again.
- Drain the pasta and arrange on a plate.
- When the spinach is just wilted, add the cranberries, pecans, and white pepper. Stir gently. If it is too dry, add a little stock or pasta cooking water and stir gently. If you added too much, let it cook off before you take it off the heat.
- Turn off the heat. Arrange the vegetables over the pasta.
- Grate romano or parmesan cheese over the top.
Cranberry Wild Rice Pilaf
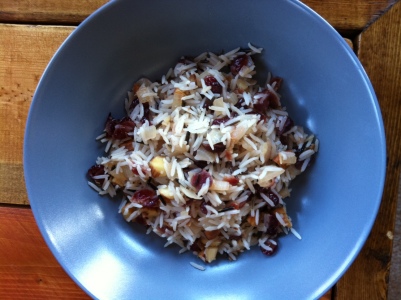
This is a slightly sweet, rich pilaf that also works as a great side.
You need:
- 1/4 cup basmati rice
- 1 tbsp wild rice
- 1 tbsp dried cranberries
- 1 tbsp sliced or slivered almonds
- 1 tbsp finely chopped onion
- 1/4 tsp finely chopped habanero or other red chili (optional). You can also use a whole chili for flavor, then take it out when you are done cooking.
- 1 tbsp olive oil
- salt to taste
How to:
- Add the wild rice to the basmati and wash well. Rinse and set aside.
- Place the cranberries in a bowl of warm water.
- Heat the oil in a deep skillet or wok.
- Add the onion and stir. Turn the heat down to medium and cook for about 3-4 minutes, stirring frequently, until the onions are cooked.
- Add the rice and stir well for about a minute.
- Add 1.5 cups of water and stir.
- Bring to a boil, then reduce heat to a simmer.
- Add the salt and stir
- Cook until the rice is done, stirring occasionally (the wild rice may take a little longer than the basmati). You might need to add a little more water, but always add it only a bit at a time, because you don’t want squishy rice. Make sure the rice doesn’t stick to the bottom.
- When the rice is cooked (soft but not squishy), turn off the heat.
- Toast the almonds in a hot pan very quickly. They should be golden-brown, not dark brown.
- Drain the cranberries and add them and the almonds to the rice. Stir.
- Garnish with cranberries and almonds.
Dilled Celery Root and Potatoes
Celery root is an ugly, gnarly-looking root vegetable. It tastes like celery, although the root and stalks are not cultivated from the same varieties. It’s tasty, lower carb than potatoes, and you can eat it either raw or cooked. This recipe calls for cooking. Remember, you have to cut away the peel, so you won’t get much out of each root. Buy the smaller ones with fresh green tops, no slime, and they should not be green.
You need:
- 1 celery root, chopped into 1/4″ pieces (see note)
- 2 medium-sized potatoes like Yukon Gold, chopped into 1/4″ pieces
- 3/4 cup vegetable stock (you can use water if you don’t have any broth or stock)
- 1 tbsp finely chopped dill
- 4-5 green onions
- Salt to taste
- A pinch of Chinese five spice (optional)
How to:
- Cut the green leafy parts off the green onions. Chop the whites finely (remember to discard the root end).
- Heat a little oil in a non-stick pan. (I use Cuisinart’s hard anodized cookware and don’t actually need the oil).
- Add the chopped onions (white parts only) and cook for 4-5 minutes.
- Add the celery root and potatoes and stir.
- Add the salt and five spice and stir.
- When it starts to stick to the bottom, add the stock or water and stir well. Be careful not to break the vegetables.
- Cover and cook until the vegetables are tender but not mushy.
- While it it cooking, finely chop the onion greens and the dill. Do not cut the dill up too much, as it will then lose its smell.
- Once the vegetables are tender, add the onion greens and dill and stir. Take off the heat.
You can eat this over rice, with chapattis, or stuffed into a pita. I ate it just by itself, with some yogurt.
Note: To prepare celery root, wash it well. Scrub with a vegetable brush. Cut off the top and root ends, about 1/2″ on each side. Using a sharp knife, cut away the peel. You could use a peeler, but it might be more difficult. Rinse, wipe dry, and now it’s ready to use. It’s a little tough to cut, so be careful.
Watercress Soup
Prep time: 10 minutes
Cook time: 20 minutes
I discovered a new soup! Watercress was one of those things I would stare at in the grocery, wondering what I could do with it. I even bought it once, intending to make sandwiches with it, and then couldn’t figure out quite how to make a sandwich with it. Also, I don’t really make and eat sandwiches.
But soup! Even cooked (I think) watercress is an excellent source of Vit. A, C, and K. It’s incredibly low-calorie! It tastes delightful! It promotes world peace!
Okay, not that last, sadly, but it’s goooood. Trust me. Try it. And it’s quick!
You need:
- 2 loosely packed cups of watercress (1 bunches), washed
- 1/4 cup finely chopped white or yellow onion (not red, red has a stronger flavor)
- 1/4 cup finely chopped leek (white only; leave out if you don’t have any)
- 2 cups low-sodium (or sodium-free) vegetable stock/broth/bouillon
- 1 medium-sized potato, peeled and diced into 1/2 inch pieces
- 1/2 tsp salt, or to taste
- 1/2 tbsp olive oil (EVOO)
How to:
- Heat the oil in a saucepan–something with a tight-fitting lid.
- When it is hot, add the onion and leek and stir.
- Cook for a few minutes, stirring now and again, until the vegetables are soft, but not browned. (If they do start turning brown, don’t worry about it. Turn down the heat and add a couple of spoons of the broth, and stir.)
- Add salt and stir.
- Add the potato and stir. Cook for 1-2 minutes. If the potatoes start “catching” on the bottom, add a little bit of the broth. Just a little. And stir.
- Add the watercress and stir well. Cook until the watercress has just wilted.
- Add the broth, stir, and cover.
- Cook until the potatoes have cooked. This should take about ten minutes, but keep an eye on them. Don’t overcook the watercress or it will lose its flavor.
- Turn off the heat.
- Put the soup in a glass bowl with high sides and blend with a hand blender. OR, take out the solids and blend in a food processor, then put the blended solids back in the rest of the soup.
- Strain. Dispose of the pulp (compost, use in a sauce, etc.)
- Add crushed black pepper and enjoy!
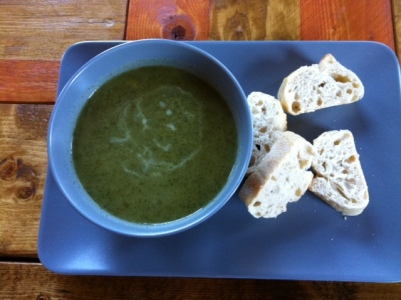
My plan is to eat the soup for lunch, with a little baguette, a little 18-year old balsamic vinegar…
Note: I suppose you could also make this in the slow cooker. Turn it on high, add the oil, onions, and leeks. Cover. After 30 minutes, add everything else, stir, and cook on low for 6-7 hours. Then blend, strain, etc. Be warned, though, that I haven’t tried this in a slow cooker. I’m offering a hypothetical possibility 🙂
Chinese Van Vegetable Fried Rice
Growing up in India, I loved Indian-Chinese food (especially from the Chinese food vans) and miss it sorely in the U.S. So I tried my hand and making some vegetable fried rice that matched my memories. This was pretty good. I paired it with Chilli Potatoes (recipe forthcoming), which hit the spot!
The whole thing takes about an hour to put together.
You need:
- 1 cup rice, preferably basmati
- A handful of fresh green beans, julienned (cut into very thin strips, about 1-2 inches long)
- The same amount of julienned carrots
- 4-5 spring onions, sliced finely. Separate the greens and whites.
- 2 tbsp julienned ginger
- 1 cup bean sprouts
- 2 tbsp soy sauce (low-sodium if you have it)
- A pinch of Chinese five-spice (optional)
You can also use other vegetables like bell peppers or celery, but make sure everything is cut to the same size, which will ensure even stir-frying.
How to:
- Cook the rice with 1 tsp oil. While it is cooking, prepare the vegetables. Do not begin to cook them until the rice is done, as they will cook quickly.
- Put the cooked rice into a big plate and spread out to cool.
- Heat 2 tbsp oil in a hot pan. Keep the pan on a medium to high heat.
- When it is hot, add the white of the spring onions, and stir quickly. Add the rest of the vegetables and keep stirring until they are cooked. They should still be crunchy, so keep tasting them until they are cooked and then move to the next step.
- Add the soy sauce and stir. If you scrape the bottom of the pan gently as you do this, it will pick up the bits stuck to the bottom and they will add good flavor. Don’t scrape too hard–you don’t want any burnt bits.
- Add a pinch of five-spice and mix well.
- Add the rice and mix well, taking it off the heat as soon as possible.
- If you need more salt, add salt, not more soy sauce.
Enjoy! I hope you like it. It has a very simple flavor of soy sauce, with the vegetables in the foreground. The five-spice is a very subtle taste in the background.
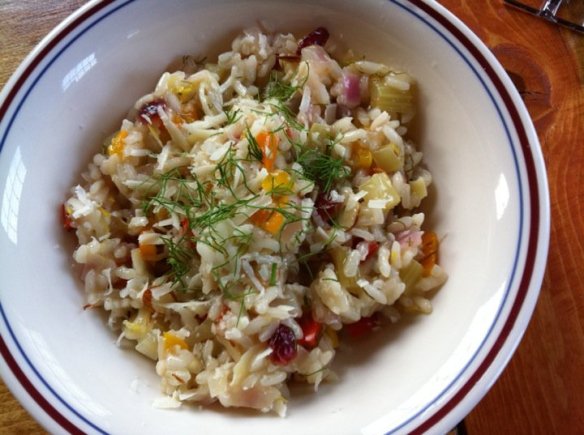
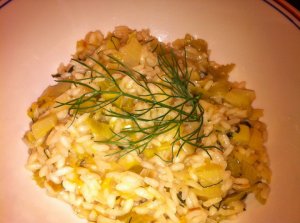
Celery and Leek Risotto with Variations
Happy new year!
I made this risotto for Christmas dinner this year, and it was light and lovely. The white wine is optional–I find it adds a sweet tang to the risotto, but if you don’t want to add it, it won’t hurt.
Risottos are a labor of love–they take about 25-30 minutes to cook, and you are stirring constantly, so don’t start this unless you have the time.
You need:
- Two medium-sized leeks, whites only, finely chopped.
- One medium-sized onion, finely chopped.
- Two sticks celery, finely chopped.
- 5 cups vegetable stock
- 1 cup white wine (a nice one you could drink while cooking)
- 1 cup arborio or other risotto rice
- 1 tbsp olive oil
- 1/4 cup grated aged gouda (I used Rembrandt–you could also use other cheese, like parmesan or romano)
- Himalayan pink salt (or sea salt, or whatever salt you have), to taste
- White pepper (or black), to taste
- 2-3 sprigs of thyme
How to:
- Heat the oil in a large pan or dutch oven. I used a saute pan, but make sure it’s a heavy-bottomed pan. Keep the heat on medium.
- Add the onions, leeks, and celery and sweat them–cook until the vegetables are soft, stirring frequently. Add the salt. Don’t caramelize them, but they should be near that point. They shouldn’t turn brown. If they are starting to stick to the bottom, lower the heat.
- Add the rice, stirring frequently until the rice turns translucent. This may take a few minutes. The middle of the rice will still be white.
- Add the white wine and cook, stirring frequently until the wine is cooked off. If you are not using wine, simply skip this step.
- Add the thyme and stir gently.
- Add the stock, a cup at a time. Here’s how. Add a cup of stock. Cook, stirring often. When it is almost cooked out, add another cup of stock. Repeat. Keep doing this until the rice is cooked. It should be cooked al dente–still a little hard, but done through. Risotto typically has a creamy consistency.
- Add the pepper and stir gently.
- Turn off the heat, add the cheese, stir, remove the thyme, and serve hot.
I have frozen this risotto, but it lost something in texture and flavor when I reheated it.
Variations:
- Replace one leek with a small bulb of finely chopped fennel.
- Instead of the thyme, use rosemary or basil or fennel fronds.
- Replace the white wine with 2 tbsp 18-year balsamic vinegar + 2/3 cup water.
- Replace the white wine with red wine. Note: this will totally change the color of the risotto.
- Replace the white wine with a dark beer. Note: while wine adds a tangy aftertaste, beer can give it a hoppy, bitter aftertaste. Not for everyone.
- After adding cheese, add toasted almonds or crushed pecans.
- Top with panko breadcrumbs. Do not mix these in as they might (just might) get a wee bit soggy.
